Do you know what is in season this month? Strawberries! I have already had plenty of strawberry tartines but to me, this also means there are plenty of fabulous fresh desserts to be had. The ultimate delicious dessert to have with those wonderful berries for me is a simple strawberry tartlet with a thin buttery crust and pastry cream made with really good vanilla.
Another thing I love in desserts is chocolate and more recently, tonka bean (I am resisting the urge to sprinkle it on every sweet thing I eat). So, why not mix those flavours with a lovely strawberry tartlet?
Another thing I love in desserts is chocolate and more recently, tonka bean (I am resisting the urge to sprinkle it on every sweet thing I eat). So, why not mix those flavours with a lovely strawberry tartlet?
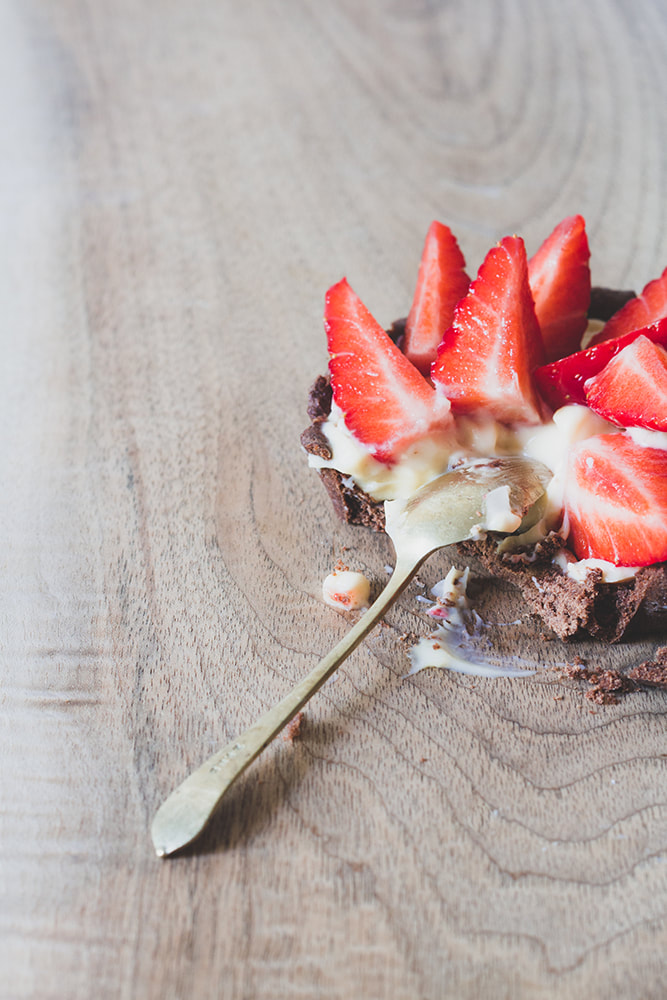
For this recipe, I made a delicious buttery chocolate dough for the tartlet shells. I then swapped the vanilla in the pastry cream for grated tonka bean. A few pieces of strawberries on top et voilà! The combination was really lovely and I could not resist eating one of those straight after I finished taking the photos (believe me, sometimes it is hard waiting for every shot to be over to eat the finished product when you can smell all the delicious things).
What is your favourite way to eat strawberries? On their own or in a dessert? Let me know if you give this recipe a try.
What is your favourite way to eat strawberries? On their own or in a dessert? Let me know if you give this recipe a try.
Strawberry, Chocolate and Tonka Bean Tartlets Recipe (Vegetarian)
Ingredients (make 6 tartlets)
For the chocolate pastry dough
65g unsalted butter (kept at room temperature)
115g sifted plain flour (plus extra flour for dusting)
25g sifted cocoa powder
1 medium size egg
65g caster sugar
For the tonka pastry cream
200ml milk
1/2 grated tonka bean
50g egg yolks
50g caster sugar
20g corn flour
20g unsalted butter (diced and softened)
a punnet of strawberries (about 200 to 250g - quartered or sliced)
Making the chocolate tartlet shells
1. Cream the butter with a fork in a large bowl. Add the sifted flour and cocoa powder and mix with your fingers until you get a crumbly texture.
2. Make a well in the centre. Add the egg and sugar. Blend the ingredients together with your hands (or use a food processor if you prefer) until you get a smooth dough. Roll the dough into a ball, cover it with clingfilm and chill in the fridge for at least one hour before use.
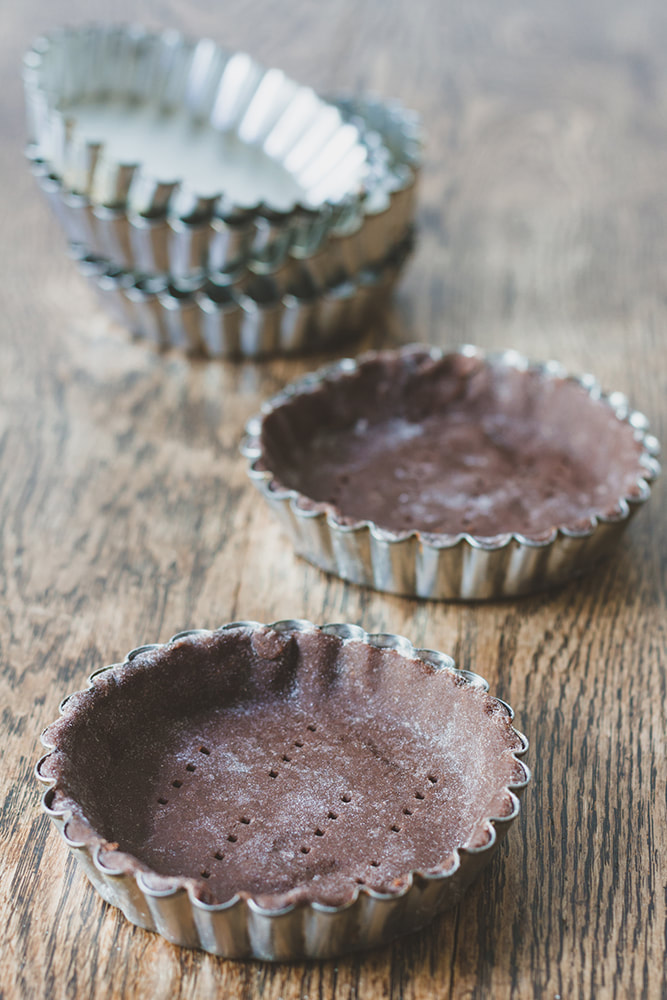
3. Dust a large flat surface with flour. Roll out the chocolate dough (2 to 3mm thick) and cut out six 10cm-diameter circles (you can use cookie cutters for this or your tartlet tin). Dust the flour off the dough with a pastry brush and line 6 tartlet tins (10cm diameter). Leave in the fridge for 30 minutes.
4. Preheat the oven to 180ºC.
Prick the tartlet bottoms with a fork. Line each tartlet with a little piece of baking paper and fill with ceramic baking beans (I also sometimes use dry rice when no ceramic beans are available). Put the tartlets on a baking tray on the middle shelf of the oven and blind bake for 15 minutes. Remove the ceramic baking beans and baking paper and bake for another 5 minutes.
5. Let the tartlet shells cool in their tins for about 5 minutes before delicately unmoulding and transferring onto a wire rack. Let them cool down completely before use.
Making the tonka pastry cream (best made ahead to serve cold)
1. Pour the milk in a saucepan. Stir in half a grated tonka bean. Put over a medium heat and cook until it is almost boiling. Take off the heat, stir and set aside.
2. Put the egg yolks, corn flour and sugar in a baking bowl and whisk until the mixture is thick and pale.
Whisk in half of the warm milk and pour the whole mixture back into the saucepan. Put the saucepan over a medium heat and whisk until it boils and thickens.
3. At this stage, transfer the pastry cream into a bowl. Put a piece of baking paper or cling film directly on the surface to avoid getting a skin on the pastry cream. Cool down for 5 minutes (or until it reaches 55ºC if you have a cooking thermometer).
4. After 5 minutes or when it has reached 55ºC, add in the softened butter and stir until it is well mixed together. Put the baking paper back on the surface and cool down completely before refrigerating. Keep in the fridge until serving.
Assembling the tartlets
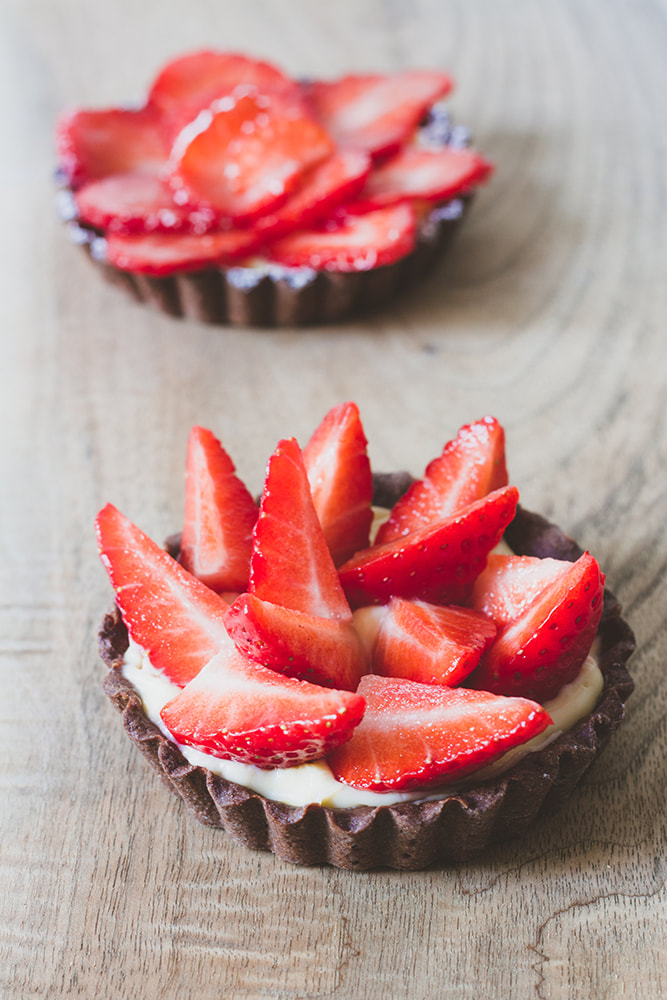
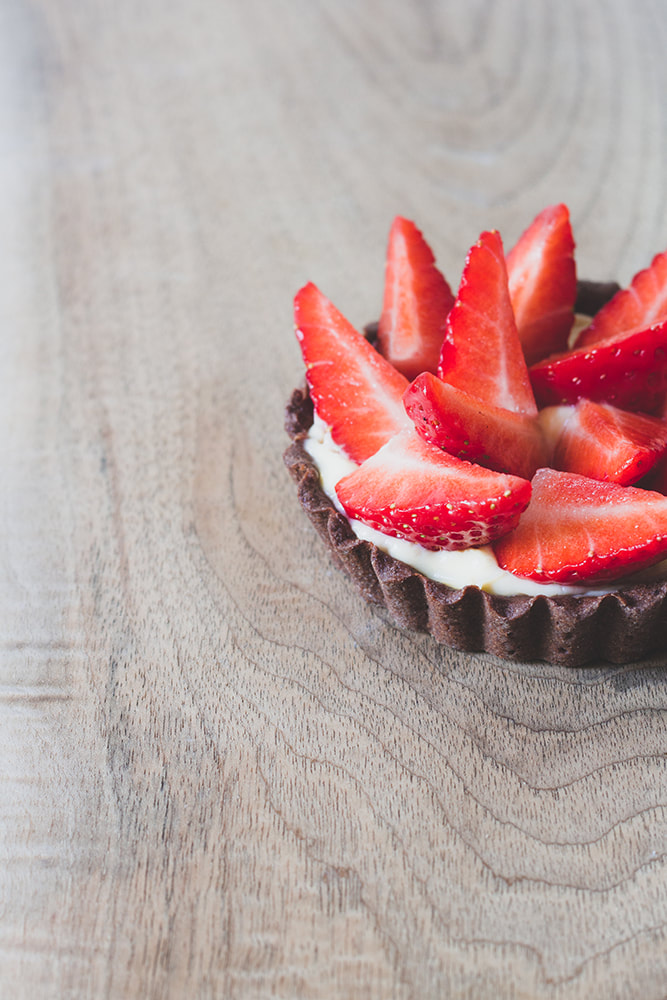
Fill each chocolate tartlet shell with tonka pastry cream (leaving space for fruit at the top). Layer some sliced or quartered strawberries and serve.
Note: I would recommend assembling the tartlets not too long before serving and keeping them refrigerated. They are best eaten the same day as they will get soggy with the pastry cream and fruit juices overnight.
Bon appétit!
Ingredients (make 6 tartlets)
For the chocolate pastry dough
65g unsalted butter (kept at room temperature)
115g sifted plain flour (plus extra flour for dusting)
25g sifted cocoa powder
1 medium size egg
65g caster sugar
For the tonka pastry cream
200ml milk
1/2 grated tonka bean
50g egg yolks
50g caster sugar
20g corn flour
20g unsalted butter (diced and softened)
a punnet of strawberries (about 200 to 250g - quartered or sliced)
Making the chocolate tartlet shells
1. Cream the butter with a fork in a large bowl. Add the sifted flour and cocoa powder and mix with your fingers until you get a crumbly texture.
2. Make a well in the centre. Add the egg and sugar. Blend the ingredients together with your hands (or use a food processor if you prefer) until you get a smooth dough. Roll the dough into a ball, cover it with clingfilm and chill in the fridge for at least one hour before use.
3. Dust a large flat surface with flour. Roll out the chocolate dough (2 to 3mm thick) and cut out six 10cm-diameter circles (you can use cookie cutters for this or your tartlet tin). Dust the flour off the dough with a pastry brush and line 6 tartlet tins (10cm diameter). Leave in the fridge for 30 minutes.
4. Preheat the oven to 180ºC.
Prick the tartlet bottoms with a fork. Line each tartlet with a little piece of baking paper and fill with ceramic baking beans (I also sometimes use dry rice when no ceramic beans are available). Put the tartlets on a baking tray on the middle shelf of the oven and blind bake for 15 minutes. Remove the ceramic baking beans and baking paper and bake for another 5 minutes.
5. Let the tartlet shells cool in their tins for about 5 minutes before delicately unmoulding and transferring onto a wire rack. Let them cool down completely before use.
Making the tonka pastry cream (best made ahead to serve cold)
1. Pour the milk in a saucepan. Stir in half a grated tonka bean. Put over a medium heat and cook until it is almost boiling. Take off the heat, stir and set aside.
2. Put the egg yolks, corn flour and sugar in a baking bowl and whisk until the mixture is thick and pale.
Whisk in half of the warm milk and pour the whole mixture back into the saucepan. Put the saucepan over a medium heat and whisk until it boils and thickens.
3. At this stage, transfer the pastry cream into a bowl. Put a piece of baking paper or cling film directly on the surface to avoid getting a skin on the pastry cream. Cool down for 5 minutes (or until it reaches 55ºC if you have a cooking thermometer).
4. After 5 minutes or when it has reached 55ºC, add in the softened butter and stir until it is well mixed together. Put the baking paper back on the surface and cool down completely before refrigerating. Keep in the fridge until serving.
Assembling the tartlets
Fill each chocolate tartlet shell with tonka pastry cream (leaving space for fruit at the top). Layer some sliced or quartered strawberries and serve.
Note: I would recommend assembling the tartlets not too long before serving and keeping them refrigerated. They are best eaten the same day as they will get soggy with the pastry cream and fruit juices overnight.
Bon appétit!

